Home Network TLS Certificates
This post describes how I’ve been handling TLS Certificates for private services on my home network for several years now. None of these services are reachable from outside of the private network.
Trusted TLS Certificates are important for network service security. Modern browsers display scary warnings when accessing a webpage over HTTP, or when using self-signed certificates for HTTPS. Certs used to be difficult and expensive to obtain. The expense placed TLS certificates out of reach for any sane home network or self hosted service. These days thanks to Let’s Encrypt, Cloudflare’s free plan and DNS-01 challenges, proper certificates can be had for free.
Ownership of a domain is still required, but the certs themselves are free.
This solution works well for privately hosted services that are not accessible from outside the local network. Alternative solutions include:
- Self-signed certificates for all services. Each service just uses a self-signed cert. This solution is terrible, since you need to add trust for all of these certificates to all devices. The problems get worse when services need to talk to each other over TLS.
- Self hosting a Certificate Authority. While better than dealing with a bunch of self-signed certificates, the self hosted CA approach doesn’t work so well since you would need to add the root cert to every device’s trusted certificates. It’s really just self-signed certificates with extra steps.
- Rolling with HTTP. HTTP is insecure, and modern browsers do a great job of making this annoying.
General Steps
- Register a domain. Any cheap, ideally short domain.
- Follow Cloudflare’s instructions for using Cloudflare’s DNS. It’s perfectly OK to have a domain with DNS entries that don’t point to anything public. The important thing here is that Cloudflare can be used to handle the DNS-01 challenges. As a follow up: You may want to enable DNSSEC as well. Instructions for DNSSEC can be found in the linked Cloudflare docs.
- Get a Cloudflare API token. API Tokens are a secret.
- Utilize Certbot or other more specific tools to request certificates and to automatically handle renewal.
Specific Technologies
OPNSense
Install
os-acme-clientInstall located at
System -> Firmware -> Pluginsin the UIConfigure ACME Client
- Add account information under
Services -> ACME Client -> Accounts. You’ll probably need to click theAccountstab when in theAccountssettings. The only information needed here isNameandEmail. - Configure challenges under
Services -> ACME Client -> Challenge Types. Add a new challenge type. Select DNS-01 challenge type. Select Cloudflare as the DNS service. Add CloudFlare Account ID, API Token, and ZoneID in the appropriate fields. - Add a certificate under
Services -> ACME Client -> Certificates, use the DNS name you access OPNSense at. I use something likerouter.my.domain - Optional but recommended: Add a restart automation under
Services -> ACME Client -> Automationsto automatically restart the WebUI when a new cert is received.
- Add account information under
Synology NAS
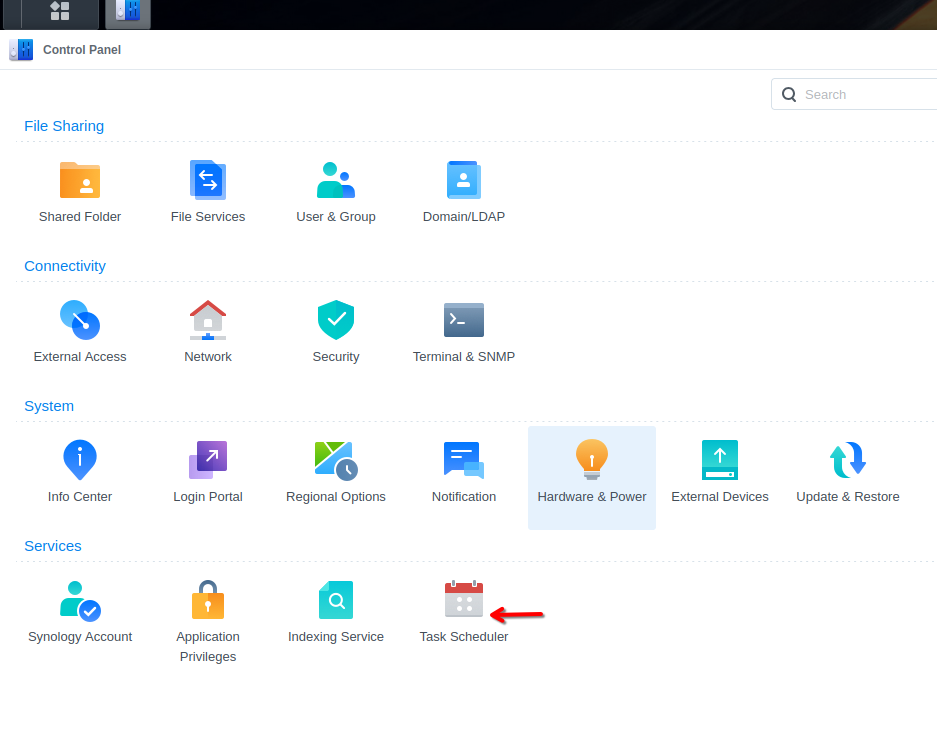
The Synology NAS requires a little script to automatically create and renew certificates. I use the Task Scheduler similar to how I would use cron.
Install acme.sh on your NAS. You probably need to enable SSH to the NAS for this step. My installed location is
/usr/local/share/acme.sh/acme.shAdd a user defined task to renew certificates
Script contents:
BASH1/usr/local/share/acme.sh/acme.sh --renew -d "mynas.my.domain" --home /usr/local/share/acme.shYou may need to run acme.sh manually once to get a certificate. I’m not sure, I set this up years ago.
Docker Compose Services
For services running in docker compose I recommend Caddy as a reverse proxy. Caddy makes certificate handling a snap.
Build a caddy image with Cloudflare DNS solver. Why do we need to build our own image? Because you can only have so many nice things.
Caddy Dockerfile:
DOCKERFILE1 2 3 4 5FROM caddy:builder AS builder RUN caddy-builder \ github.com/caddy-dns/cloudflare FROM caddy:latest COPY --from=builder /usr/bin/caddy /usr/bin/caddyCreate a Caddyfile
Sample Caddyfile
1 2 3 4 5 6 7{ acme_dns cloudflare {env.CLOUDFLARE_API_TOKEN} } service.my.domain { reverse_proxy service-container-name-here:8080 }Create a docker compose file
1 2 3 4 5 6 7 8 9 10 11 12 13 14 15 16 17 18 19 20 21 22 23 24 25 26 27 28 29services: caddy: image: caddy restart: unless-stopped networks: - caddy container_name: caddy cap_add: - NET_ADMIN - CAP_NET_BIND_SERVICE - CAP_NET_RAW ports: - "80:80" # For redirect - "443:443" - "443:443/udp" volumes: - Caddyfile:/etc/caddy/Caddyfile - /path/to/data/dir:/data - /path/to/conf/dir:/config environment: CLOUDFLARE_EMAIL: "email_here" CLOUDFLARE_API_TOKEN: "token_here" ACME_AGREE: "true" service-container-name-here: image: my-service-image:latest networks: - caddy networks: caddy:
Kubernetes
Use Cert Manager. It’s fantastic.
Install instructions
BASH1 2 3 4 5 6 7helm repo add jetstack https://charts.jetstack.io --force-update helm install \ cert-manager jetstack/cert-manager \ --namespace cert-manager \ --create-namespace \ --version v1.16.2 \ --set crds.enabled=trueConfigure Cert Manager for DNS-01 instructions
You’ll need to create an issuer. Instructions should be in the link.
Request certs.
Certificates can be automatically requested by adding tags to deployment manifests.
This is a sample ingress from my Grafana deployment via helm:
YAML1 2 3 4 5 6ingress: enabled: true annotations: traefik.ingress.kubernetes.io/router.entrypoints: websecure traefik.ingress.kubernetes.io/router.tls: "true" cert-manager.io/cluster-issuer: letsencrypt-prod-cluster
The Missing Pieces
- Some IP cameras on my network don’t have a nice API for updating certificates. Someday I’ll hack something together.
- My WiFI APs do not seem to have a nice API for setting TLS certs for the management WebUI. I’m sure I’ll investigate this more later.


